
A journey through the making of my garden.
March 2012 in Devon has been totally amazing weather-wise this year, so I have been up with the lark or very often the Greater Spotted Woodpecker tapping away outside my bedroom window. I left the vegetable garden alone last year as I had no time - busy with jewellery making. I am pretty well stocked up with jewellery for galleries now and can afford to put all my time and effort into the hard work that my little patch of ground is demanding of me now for a while at least. This is the task ahead! Part of it at least.
March 2012 in Devon has been totally amazing weather-wise this year, so I have been up with the lark or very often the Greater Spotted Woodpecker tapping away outside my bedroom window. I left the vegetable garden alone last year as I had no time - busy with jewellery making. I am pretty well stocked up with jewellery for galleries now and can afford to put all my time and effort into the hard work that my little patch of ground is demanding of me now for a while at least. This is the task ahead! Part of it at least.

A thick layer of grass and heavy duty weeds waiting to be removed.

So, enter with me through my partly completed garden gate which takes you from flower garden into vegetable garden. I can promise you that all will look divine eventually, just like one of those wonderful gardening photos that we love to remind ourselves nowadays with on Pinterest!
 April - and almost finished. Needs another coat of paint and one more rail, then planting can begin. I will put in a path as well as it gets very slippery here. probably crazy paving or herringbone brick if I can find some old red bricks.
 I've transplanted, very carefully the roses that I thought would make a good veil of privacy between me and my neighbour as they were not thriving. They have been given every opportunity to get a move on now. I have added two more to help it all along. No use having a bare arch way into the vegetable garden.


March - well - what can I say?!! I need to make a new gate that looks rather more like a gate that belongs to a vegetable garden. Making it accessible would also help. I do love taking on challenges like these. Good job really.

The work of skimming off the surface begins. The canes are measuring and marking out the size and centre of the plot.

Room for one new Blackcurrant bush and a few late fruiting Raspberries on the left as I prepare to dig number one potato bed. We don't really eat many potatoes but I am hoping that they will help to open up the soil and then perhaps I will be able to barter them later on. I could start to look at where I might build a potato clamp. They are such a good idea.


March - Red Onions and Shallots inter-sown with a first sowing of mixed Radishes and Spring Onions. Protected in a fashion by wire - inquisitive chickens and wandering pigeons! This is a good idea, seems so obvious now that I look at it but it never occurred to me. Courtesy of the good life blog.


No
deep beds but I am going to try to contain the soil for a while at
least with a wooden edging using timber from an abandoned five barred
gate that has been left to rot on a roadside verge, entwined with
brambles and nettles. I thought that I would rescue the timber at least
and reuse it. I like the slightly ram-shackled look! Slightly? Just beyond is a round bed of wonderfully scented, tall, white Lillies with a valiant Tree Peony in the centre. I really thought the Peony had no chance of survival at the end of last year but it looks really happy now. I do like to see things rallying round and making a comeback! It's often best to leave well alone and let them grow in their own time, whilst keeping a protective eye on them.

March - slow
development of plots. I have two potato beds now and still more to
plant out but need to dig more beds! I think I will put them around the
little pond as this will help to break down the soil and leave my
imagination free to design plots for more interesting vegetables, most
of which are growing from seed in my shed. It has windows all round so
is very useful until I have a greenhouse.

March - Tadpoles have been brought on in this trifle dish since I was a child. These are a few baby frogs that have been donated to my garden pond project by Hill House Nursery at Landscove, not far away. The parent frogs were very impressive and quite elegant with white throats and underbellies - I was impressed anyway! After a bit more research I have to say that I could well have been a little too impressed by what is in fact the simply the changing colours of the mating male frogs. Very good looking all the same!
 An altogether magnificent specimen all the same, courtesy of the cabinet of curiosities


March - I seem to have a quasi-magical relationship with our local re-cycling centre, in as much as whenever I decide I need something for the garden and/or the cottage etc, I give the idea a little extra thought, make a wish and go into town and there it is! This morning I was thinking 'pond liner' and there it was. Here it is waiting for a lease of life in a new home where it will play host the my hoards of beautiful tadpoles who when grown will devour all manner of garden pests and predators.

The slow process of digging it in begins. The earth is pretty much clay here and full of dock roots, buttercups and couch grass, oh yes and lots of nettles. I think it is pretty much common sense when it comes to putting one of these things in. I will never be able to get all the rampant weeds out but as I want the surrounding area to be a haven for wildlife I am not too concerned. I will try to remove them as I go along.

The pond is intended to be bang in the centre of the vegetable garden. I will plant out my Courgettes around the edges and pop in some Borage and Nasturtiums on the left side of it and probably Strawberries on the right.

Level-ish! Stage one of leveling the earth around the pond at least. It has been quite hard work but I have done it over a few days with plenty of stops for green tea and pondering. The sods need to be broken down to a finer tilth now.

Tilth achieved, watered and covered up for a day or two to allow time for it all to settle a little. I know that I should really allow longer for this stage but the Tadpoles are growing rapidly and I long to give them their freedom.

The pond water looks pretty murky. It is, I have to say, mainly tap water. We have had one night of rain which will help and I have tossed in a lot of the clay as it is quite deep. I have also sown a mixture of grass seeds now, the kind that are suitable for
allowing wildflowers to live amongst. I've sown some wild flower seeds
separately in trays and will dib them in later. I will also make another
sowing in a couple of weeks with more of the grass mix plus some wild flower seeds too. I know I am being a bit over enthusiastic
and sowing earlier than is recommended but I am taking a chance with the
good weather. If we get a frost and all the seeds wither, then I will
simply re-sow. I have covered them up as an experiment as I feel that
they need a little protection from the really hot sun that we're having
this week. Plus little birds and larger chickens that are roaming
around.

April - It's a pity, in a way that the pond is so small but it was really onlt intended to be a home for the frogs that will eat the slugs etc and numerous other water creatures still to arrive. The wild grass and flower seeds are beginning to show signs of life, albeit very faintly, little hazes of green here and there.

March - the work begins on the Strawberry bed. Needs lots of rotted horse muck dug in and then to be left to settle down but there is not that much time left before planting out so fingers crossed.

April - and the pond now has a Marsh Marigold and all the tadpoles are swimming around it quite happily. The lower bed is for the Strawberries, whilst all around the lower edge of the pond, I will put in a few extra potatoes. I have sown wild grasses and wild flowers directly around the pond which will be very beautiful later on in the year. The paths are going to be simply soil for now to which I will add some chipped bark later on. Work in progress and likely to change direction at any time, as usual. I am not really a 'plan' person.

April 11th - working on till the last rays of sunshine slip down behind the Oak tree in the meadow behind. I call it a meadow when I am feeling bucolic and a field when I have to dig it! But either way, this is the perfect time to sit with a drink and survey the days work and glance around at all the work yet to do. A time to feel a little bit satisfied and content. I am, however really looking forward to the time when my gardening is more maintenance.

The task is to turn this weedy expanse into something like the photo below. I will cut off the thick grass before I skim it and stack the turf to make a cold frame, then I can get some of the plants in the studio/shed potted on and hardened off at last.

March - Added together there will be enough room for my long awaited Asparagus bed. Definitely not more potatoes! Maybe more Strawberries - time will tell.

March - Bit by bit, doing a little every day, I hope to make this pile resemble a more attractive pile. Composting comes later when I have built some bins.

April - One of my hens was badly attacked by a dog the other day but lives on valiantly after a couple of days at the vets. She is stitched up and slowly convalescing in the cottage. She used to be number one hen and top of the pecking order. I have since taken possession of two more, one of whom is very small and bedraggled. As it is now spring and our little lane is visited by walkers with dogs, who should be on leads or at least trained to heel my ladies will have to forgo their free range rights it seems. So I have to make them a run of sorts. It was intended to be in the vegetable garden but for now it will have to be in the flower garden. There is a patch which doesn't get a lot of sunshine, where I was going to build my wood store but it will now be their little run. I am aware that we have had a visiting fox trying to dig under their chicken house so I am going to dig a trench around the run to bury the wire netting in. I think the fence needs a coat of paint. I have tins of off white masonary paint which I always seem to find at the re-cycling centre for next to nothing. So far I've used it to paint the studio/shed so it will help to pull this side of the garden together.
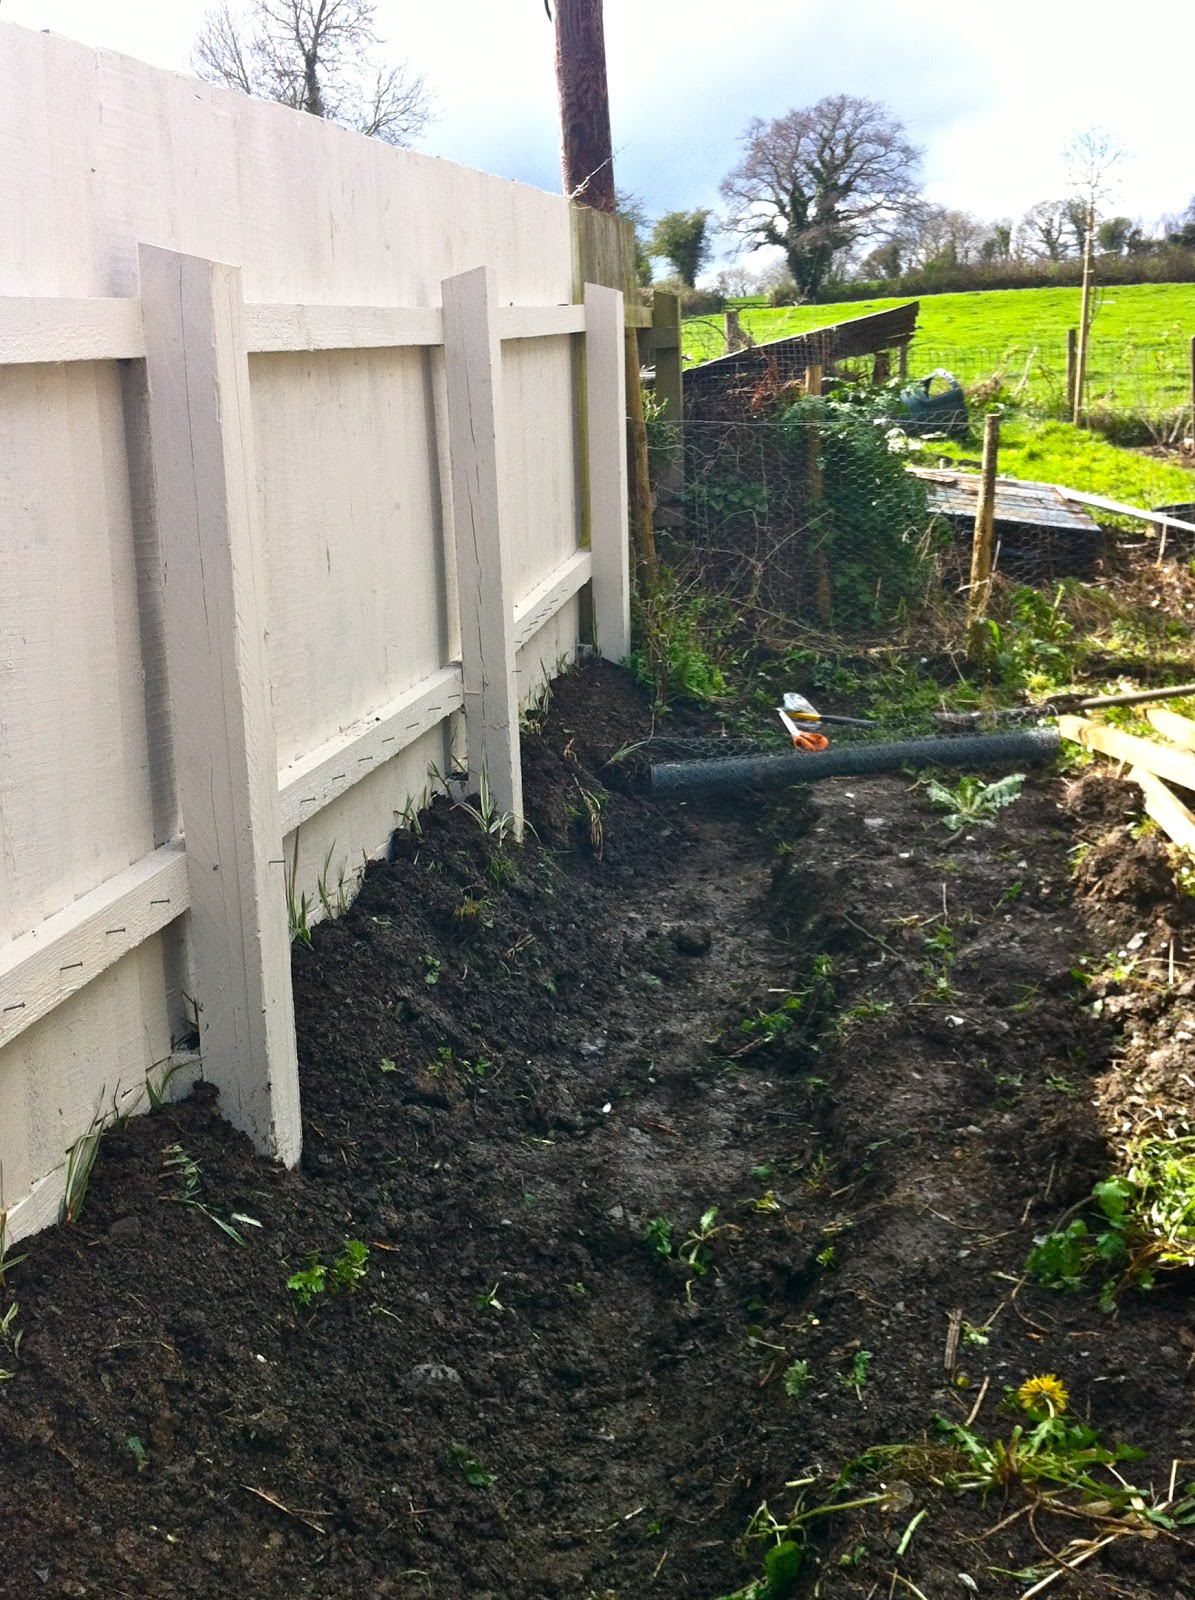
Painted and cuttings of a variegated grass popped in along the edge. Nails banged in to hold the wire netting. All done to prevent the incredible Mr. Fox from slaughtering the chickens. I have been forced to tackle this part of the garden,which is probably a very good thing as it was not really inspiring me and would have suddenly become a horrible eyesore as the spring moved into summer. It is an area tht stays shady for most of the day and could be nice for the hens if the weather becomes really hot. Long term I have very ambitious plans for an adjacent pergola and large pond.

Wire in place and dug in. Russian Vine attached to wire and fence poles painted. Though this chicken run is not in the vegetable garden exactly, I may make a wire tunnel to let them come into it from here.

Change of plan! The hen pen is going in the vegetable garden after all. It is the best place. It is raining and hailing today but there are gaps of sunshine and birdsong when I can get out in the garden and do some work. I am not experienced in doing any of this kind of work which is why it all looks so amateurish - I am an amateur after all!

I rather naively thought that this job would be done a lot quicker than it is proving so that I could get on with preparing land for planting. But the hens must be restrained from scratching too much at the plants so here is their long awaited new quarters. Today is wire netting, staples and banged thumbs!

Need more tree stakes!

I am painting tree stakes with masonary paint to create some definition and emphasize height. Digging out trench all round to bury wire netting.

Recycled sections of old five barred gate that was rotting in the hedge now providing me with a way of keeping the posts fairly equally divided and vertical. Wire netting going up a lot more easily now that I am using plastic ties toact as an extra pair of hands. In fact they can remain as they are brilliant and very strong.

Netting secured and soil covering buried wire netting. Crazy paving going down over it to ensure extra deterrent to Mr Fox. Will probably grow roses up the posts in time, interspersed until established with runner beans/sweet peas.

Emmy is meant to be one of the main beneficiaries of this hen pen after her attack by a rampant spaniel last month and on her first day back with the others all seemed to be going well until I discovered this morning that all of her beautiful newly grown feathers had been pecked and pulled out by the said others. I feel very protective. She is now back in my studio awaiting regrowth. If I knew the culprit I would pack her off to a new home. It's pretty hard on Emmy who has always been top of the pecking order regardless of having only one eye!


