
I'm now the proud tenant of an organic allotment at Riverford Farm in Devon. At the time of writing it's merely a portion of the field. I'm sitting under the umbrella considering my next move.




 Riverford Farm is organic as are all the allotments and there is an abundant supply of well rotted cow manure. This is an example of the lasagne method that I have adapted - mow the foeld, add layers of cardboard, manure, dried grass, repeat, repeat, repeat.
 I also add a lot of dried Beech leaves, that I collect when I see them driving through the countryside.
 How the allotment looked in the early days.
 Base camp - early days.
 Making lasagne beds.
 How I imagine it might look given time.
 The shed that I would like to buy for the allotment as I have realised that I have limited time for this and I still work at my jewellery most of the time.
 I have to move house - to Topsham and this eventually proves too far to make keeping the allotment on. A learning curve and very very enjoyable. Great allotment neighbours too. More photos to add ...

My hope for this allotment is to create five square 'rooms' with paths moving into and through, connecting them all together. Initially I was going to take on one full sized plot plus a half one but at the point of signing the contract I was offered an extra plot.
This means that the compost bin is now in the middle of the plot and will have to move to the far right bottom corner.
I've have a little Mountfield mower and I've mown and mown and mown the grass which had been previously rough cut by a ride on mower by the farmer. All the grass had been left so my little machine chopped it up and collected it. This is wonderful as I now have loads of grass clippings for adding to my no-dig lasagne style beds. However, the task was really far too much and there was still lots of lovely long, soft dried grass still to be raked together - again a perfect ingredient for the beds as it was basically hay.
The next stage on room number one was to measure and to peg out and divide the square plot into four and establish the centre.
The centre may be a lawn or a pond - yet to be decided but it will be circular. I shall modify this plan slightly and I am considering adding trellises. Along the dividing fence between my neighbour and myself I have created a grass path. It looks a bit like this and as time goes by with raking and mowing should begin to resemble a nice, soft, green, grassy path. I may also add seed.
I shall try be put in a rabbit proof wire netting fence around the plot, initially the main expense but well worth it as other tenants have been extolling their woes regarding the voracious appetites of young rabbits and of their breaking and entering skills. Though very expensive so I will see how it goes.
This allotment will not resemble a traditional allotment, even though I've always thought they were the best way to garden an allotment. This is because I want to create a very inspiring and beautiful retreat as I as yet have no garden of my own. I love the French Potager style of gardening and this will provide lots of inspiration but I think my allotment is going to be some sort of hybrid of my own. if you would like to explore the ultimate Potager Garden then here for Villandry.
There are lots of elements that I would like my plot to contain and I've started to collect some on my pinterest board of ideas.
This slight incline/slope of the field makes me think of terracing. No-dig terracing?
Layering up the bed with layers of wet cardboard, (be aware of using cardboard that may have formaldehyde in it) then cow manure, grass cuttings, beech leaves, more manure, hay etc, etc. The idea is to keep the layers wet but we are in a heat wave and the allotment has no running water.
This time next year and I hope to have my irrigation/rainwater collection system in place but for now I'll cover up and rely on condensation.
I have a penchant for recycling but also for making the garden beautiful. Somewhere in between I could make use of those discarded plastic banners that are used for advertising - they would make perfect covers and could even be tied to stakes as they have brass eyelets.
Mmm, I need to remember that although my enthusiasm belongs to a 21 year old, my physical age is meant to be retired.
I have been enthusiastically pulling out lots of wood from an enormous pile - that resembles a giant's Pick a Stick game - with my left arm and projecting them javelin like towards the boot of my car for a few days, collecting enough wood to start my plan of building a recycled shed.
I think I have finally learnt my lesson after damaging my left shoulder rather badly. Enough to stop play for some weeks in fact. I have promised my family that I will limit myself to swimming, walking and stretching exercises from now on and ask someone to do the extremely physical work. I am not at all pleased as I love challenges. So whilst I am in recovery mode all the beds are composting down and I am looking through shed catalogues.
I suppose I will have to pay someone to put in the rabbit proof fence as well. Damn.
Meanwhile I have been working on new ideas for autumn and winter jewellery back in the studio.

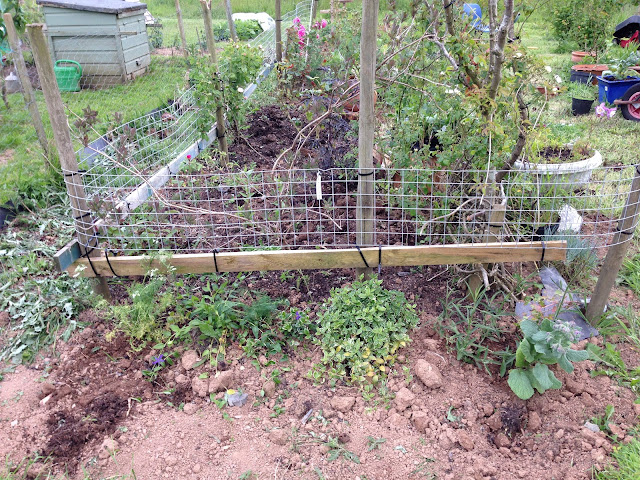
Back to work - Putting in the support structure for Raspberry canes now that the lasagne bedding system has rotted down and the soil is easy to dig.

Putting in some of my plants from my previous garden at Dartington Hall where I lived and had my studio for 4 years.
The plants have to make a temporary home here so I am enjoying the challenge of trying to make this a mixed allotment. Bella accompanies me every time I come here. I need to build her a shelter.


And here it is - build into the back of the compost bins. And next to the wood storage place. It is all looking very raggle-taggle-gypsio at the moment. I see it looking very differently in my imagination though.

Beginning to look a little better.

Transplanting my Roses and digging in a small pond for frogs.

More mowing the area and pilling up the dried grass for the lasagne beds. They really do work. Trying to be careful not to do too much. Difficult when there is so much to do.

Putting in currant bushes - white - red - black.

Strawberry plants nestlings amongst the straw.

The initial boundary.


